With data threats and security h-cks being rampant in today’s digital world, it has become more necessary than ever to practice safe browsing habits. This is why Chrome often tries blocking suspicious websites to protect users from online threats and viruses.
But if you wish to access a skeptical page, without warning blockers, you need to know how to add trusted sites in Google Chrome on your Windows 10 desktop. Is that possible? Let’s find out.
How to Add Trusted Sites in Google Chrome on Windows 10
Now you can conveniently add any website to your trusted list and get rid of always accepting permissions before opening. So, let’s show you how to give this VIP access in Chrome!
1. Open Google Chrome on your desktop and click on the three dots at the top right corner of the screen.
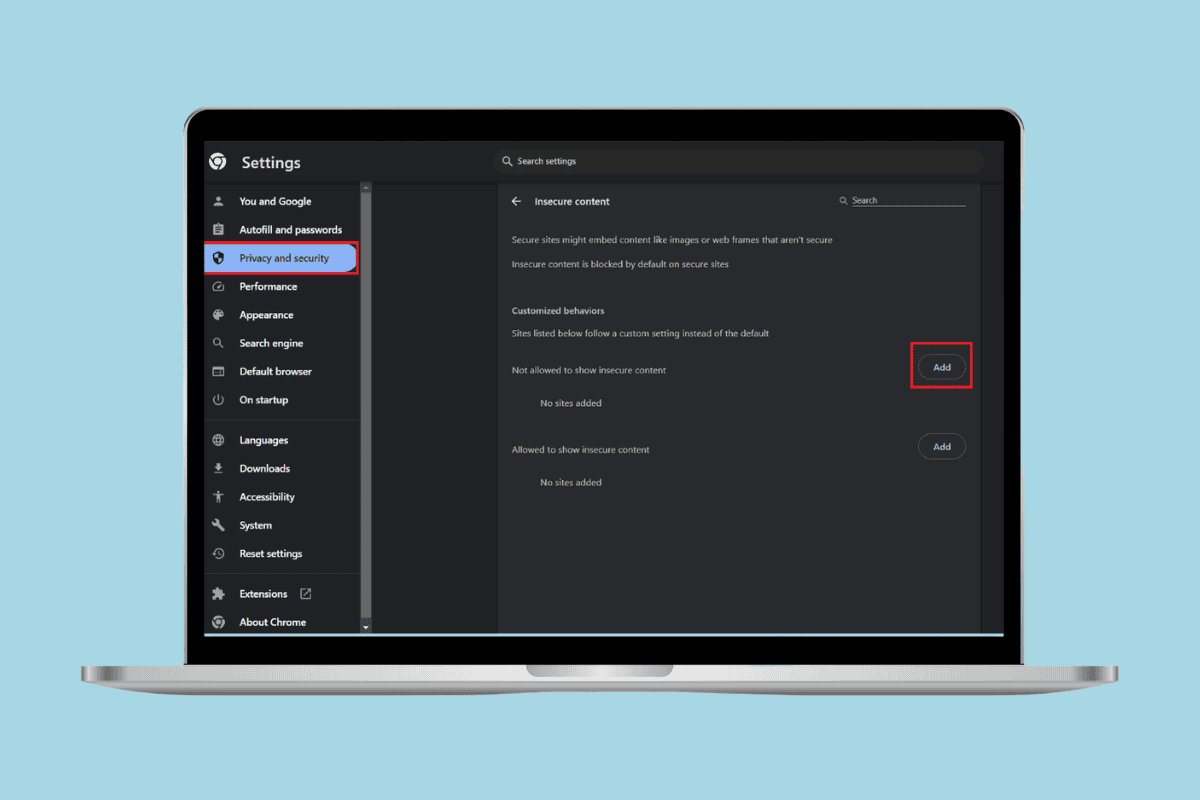
2. Click Settings and select Privacy and security from the left menu.
3. Click on Site settings.
4. Scroll down and click on Additional content settings.
5. Select Insecure content from the drop-down menu.
6. Now, click Add under Not allowed to show insecure content.
7. Copy the URL link of your selected web page and click on Add.
How Do I Grant Extra Permissions to Websites?
If you wish to grant additional permissions to some websites, follow the steps mentioned below:
1. Visit the website of your choice and click on the lock icon placed next to the URL.
2. Select Site settings from the expanded menu.
3. Under Permissions, choose the options you wish to change and click on Block or Ask (default).
4. Select Allow from the drop-down menu.
Can I Remove Trusted Sites in Google Chrome on Windows 10?
Yes, you can remove a web page from trusted sites from Google Chrome any time you wish on Windows 10 PC.
Will Chrome Trusted Sites be Synced on all Devices?
Yes, once you have added any web page under the trusted sites setting, it will be synced across all browsers including phone or desktop.