Windows 10 has several practical features intended to boost productivity and are suitable for everyday usage. If you’re a regular user, you might have seen a list of recently seen or accessed folders and files may have been visible at the bottom of the File Explorer window.
This goes a long way toward retrieving the most frequently used folders. But if you are concerned that someone using your PC can just as easily pry on them, you should know how to clear and turn off recent files in Windows 10. If you don’t, then keep reading this guide until the end!
How to Clear and Turn Off Recent Files in Windows 10
Although the recent files feature is useful when you need quick access to folders, there may be some times when you would want to disable it. Let’s find out your answer.
Method 1: Via File Explorer
The easiest way to access recent files and disable them is by accessing your File Explorer. Here’s how:
- Open File Explorer and click on File at the top left corner.
- Select Change folder and search options from the drop-down menu.
- Click on General from the top ribbon.
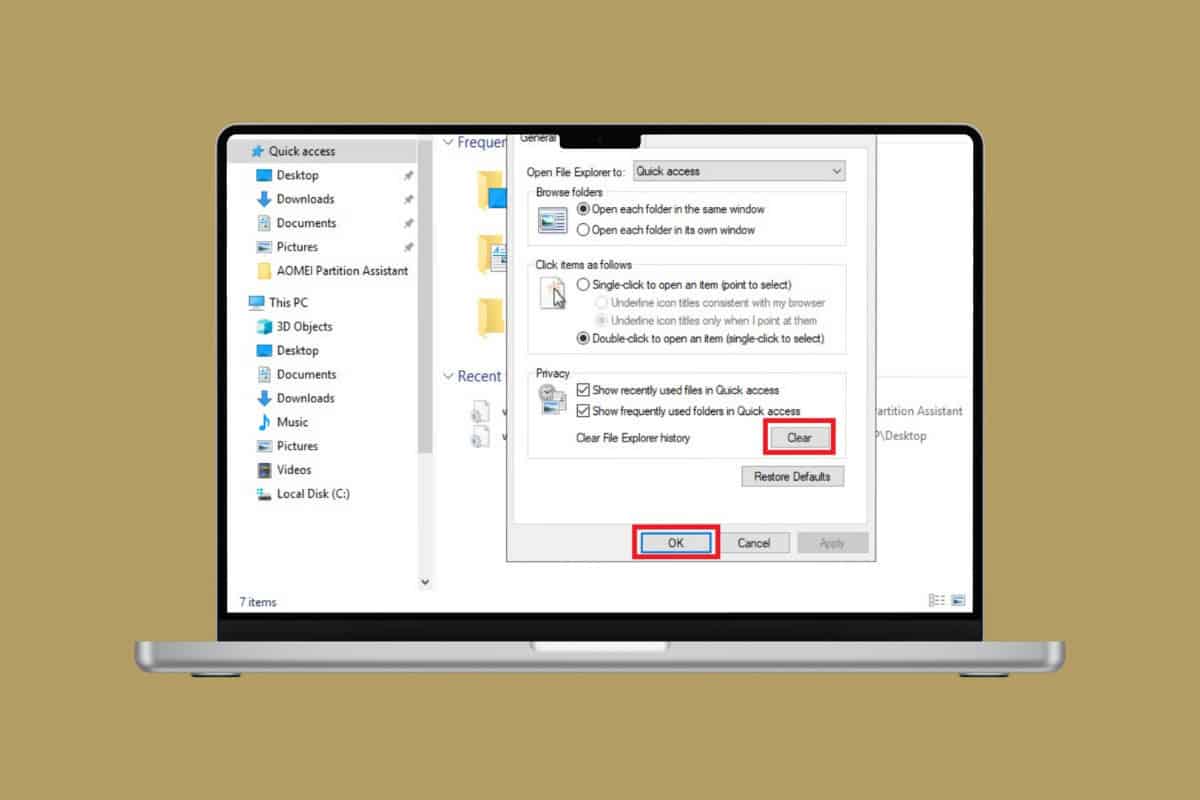
- Then, click on Clear under Privacy. Please note that you can also manually untick on Show recently used files in Quick Access and Show frequently recently used files in Quick Access.
- Now, select OK.
Now you will no longer be able to see your recently used files.
Method 2: Via Run Window
You can also use the run window and enter the proper command. Check out the steps:
- Press the Windows and R keys together to open the Run window.
- Type in the command %AppData%\Microsoft \Windows\Recent\ and hit Enter.
- Click on Select all from the top right corner.
- Then, click on down arrow under Delete from the top ribbon.
- Now, select Permanently delete.
- Hit Enter.
This way you can manually clear recent files on your PC if you no longer need them.
Method 3: Via Control Panel
Another way to do the same is through the Control Panel on your desktop. This is how:
- Open the Control Panel and click on Appearance and Personalization.
- Click on Taskbar and Navigation.
- Now, select Start from the left menu.
- Then, turn the toggle off for Show recently opened items in Jump Lists on the Start or the taskbar and Quick Access in File Explorer.
Your Windows 10 will no longer show recent files.
Method 4: Via Registry Editor
Lastly, you can turn off recently accessed files from the Registry Editor. Follow the steps mentioned below to do the same:
- Press the Windows and R keys together.
- Type in regedit and hit Enter.
- Select Yes from the confirmation prompt.
- Click on HKEY_CURRENT_USER from the left menu.
- Then, click on Software.
- Select Microsoft.
- Scroll down and click on Windows.
- Click on CurrentVersion.
- Select Policies.
- Now, right-click on Explorer and select Open.
- Click on DWORD (32-bit) Value.
- Name the created file as NoRecentDocsHistory.
- Right-click on the new value and select Modify.
- Type in 1 under Value data and select OK.
- Now, restart your desktop.
Once your desktop is turned on, you will no longer see the recent files. By following the methods shown in this guide, we hope that now you understand how to clear and turn off recent files in Windows 10.

